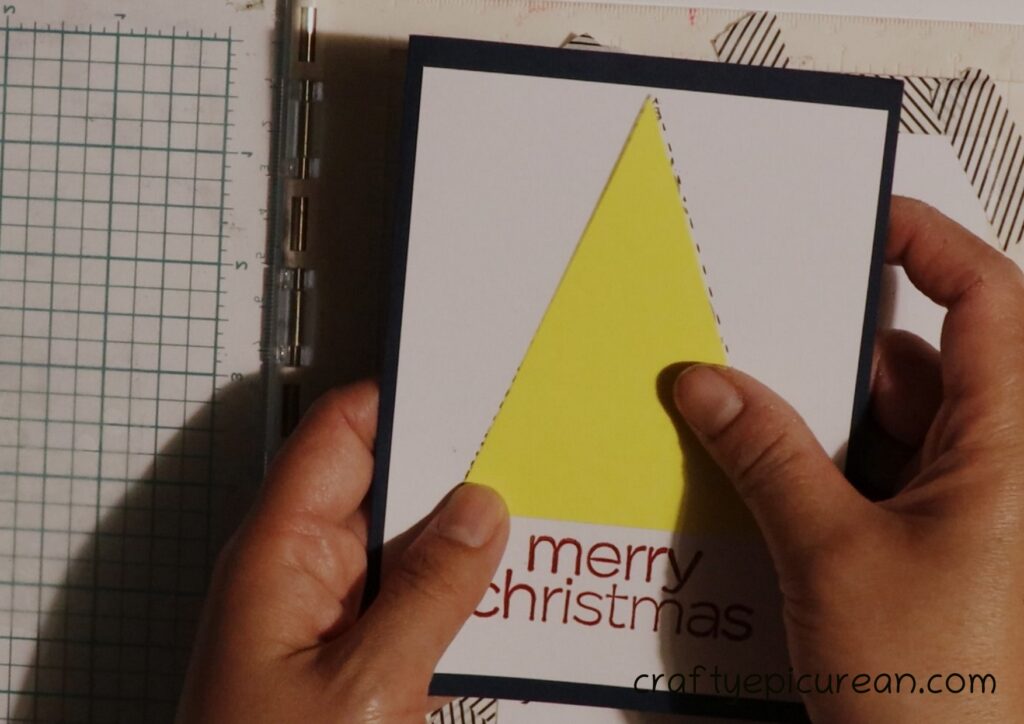
I have previously designed a basic engineering tree christmas card which was a single layer card and I did it mainly to enter a CAS christmas card challenge. However as part of the creative process, I wasn’t fully happy with it and I honestly felt it could be improved. So, I decided to try and improve the card. As you will see below, this card is made up of a blended background for the tree and uses many small image stamps from Altenew’s Engineers Rule stamp set to back fill the triangle representing the tree.
For the process video showing how I made this improved engineering tree christmas card, click on the following video below:
The first step in making this card was to make a cardboard mask. I spent a lot of time getting a nice triangle to arrange my engineering stamps into and I liked the size and shape so to save time, I cut a piece of card that covered the ‘tree triangle’ on the original card.
Engineer Tree Cardboard Mask
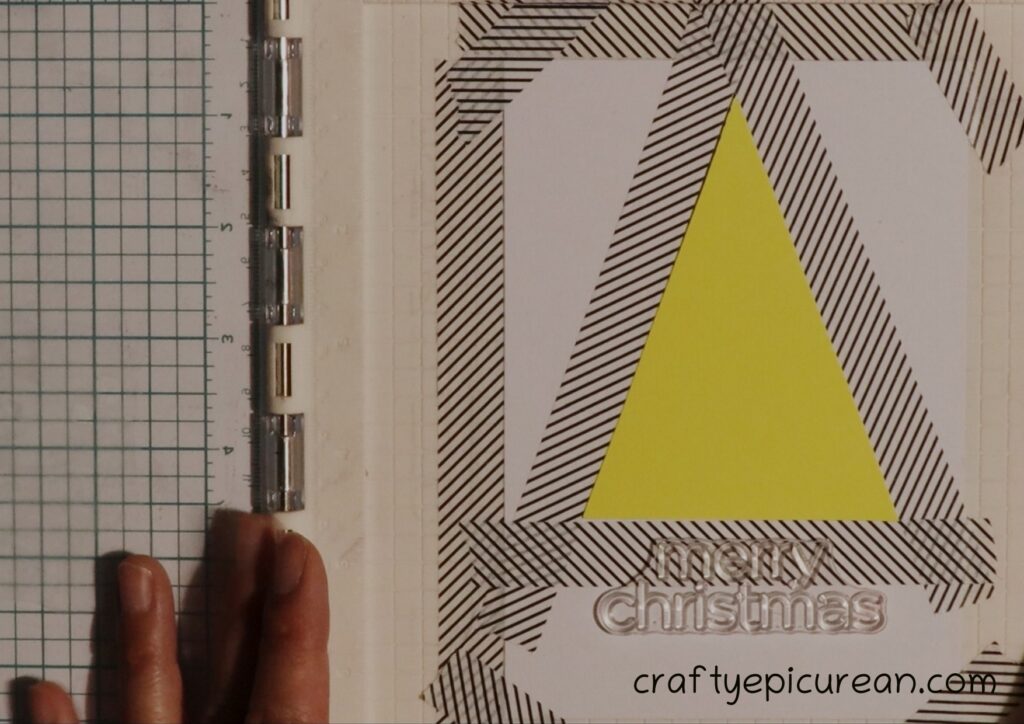
I then used that triangle cut out as a template to mask around on the new card front. I used 300gsm white card stock cut to A6 size for my card front taped to the inside of my stamping platform, which is a We R Memory Keepers precision press. Quite simply, I placed the triangle where I wanted my tree shape and taped around it with washi tape. Now I know where to arrange my engineering tool stamps and I can ensure that I get a crisp triangle image for my tree. The bonus of creating the triangle cut out is that I can now create other christmas cards with a similar design and tailor the theme of the tree to different genres, crafts or industries depending on who the recipient will be.
Masking the Engineer Tree Triangle
After masking it was time to create the blended background. I stuck with the traditional green hue for the tree and used three Ranger archival inks, “Olive,”Leaf Green” and “Sap Green.” To do the blending I used a blending brush I bought off Aliexpress.
Blending the Engineering Tree
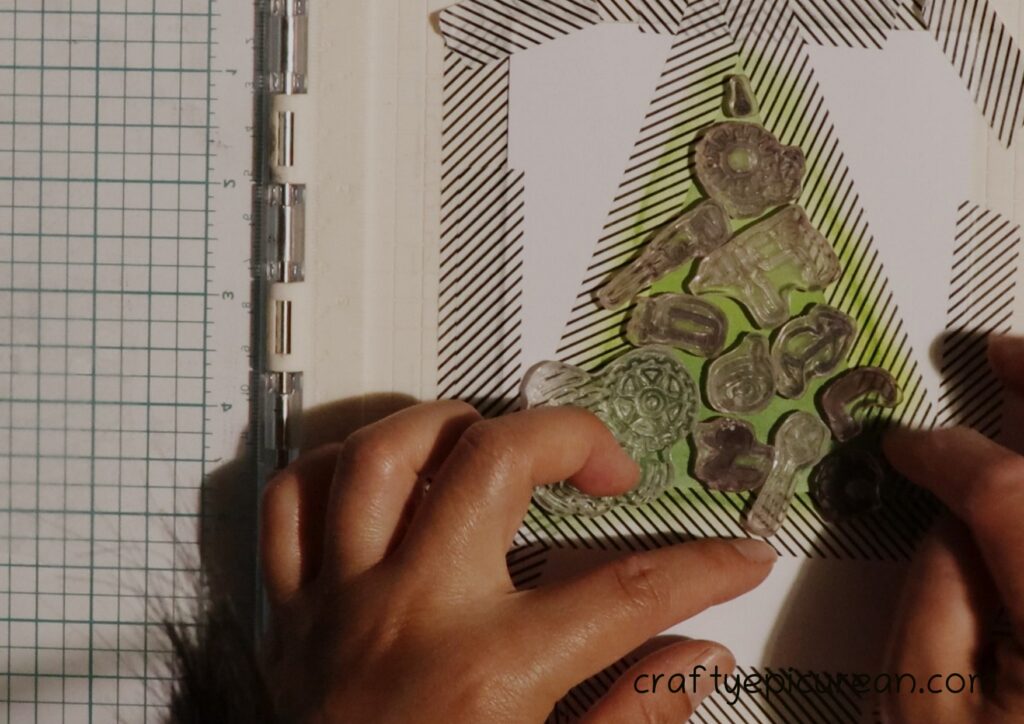
Next step is to stamp the engineering tools inside the triangle tree shape to make this an engineering tree christmas card. I arranged stamps from Altenew’s Engineers Rule stamp set inside the triangle with slight overlap over the edge to try and fill the triangle as much as possible. Then I closed the door on my stamping platform to collect all the stamps.
Arranging Stamps of Engineering Tools into Triangle
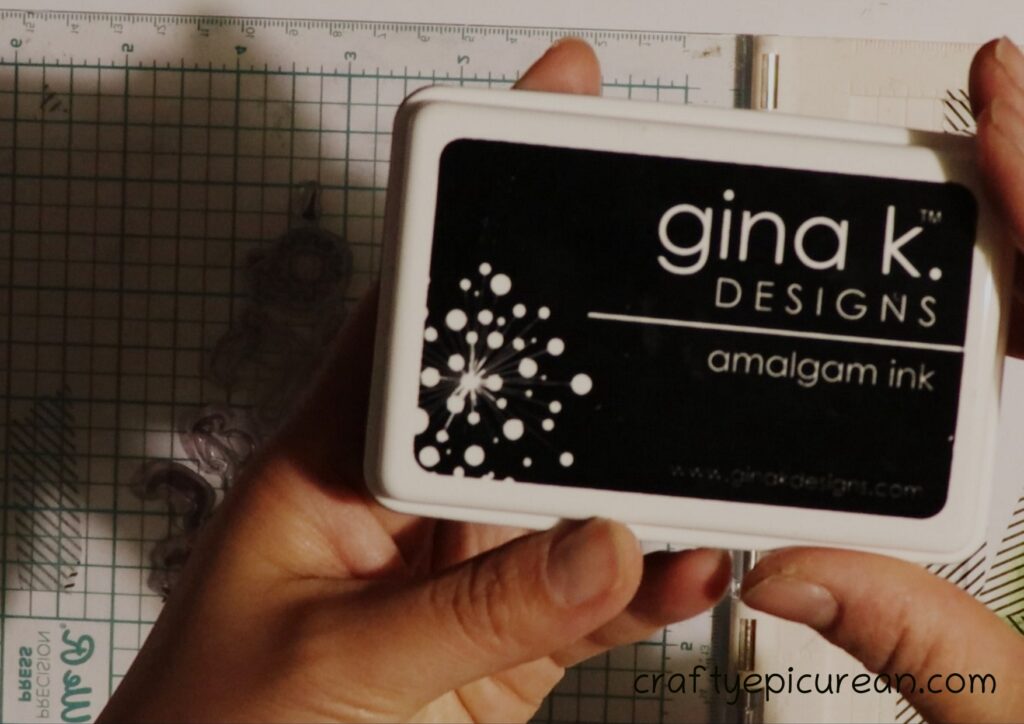
Using my Jet Black Gina K Designs Amalgam ink, I inked and then stamped the stamps. I ink and stamp the stamps a few times to make sure I get I good image. I also pressed down hard on my platform and rubbed it with my sleeve to ensure even contact across all the stamps. To make sure I didn’t accidentally stamp onto areas outside the triangle, I strategically placed a couple of post-it notes.
Placing Notes to Protect Card Front Outside of Triangle
Gina K. Designs Amalgam Ink in Jet Black
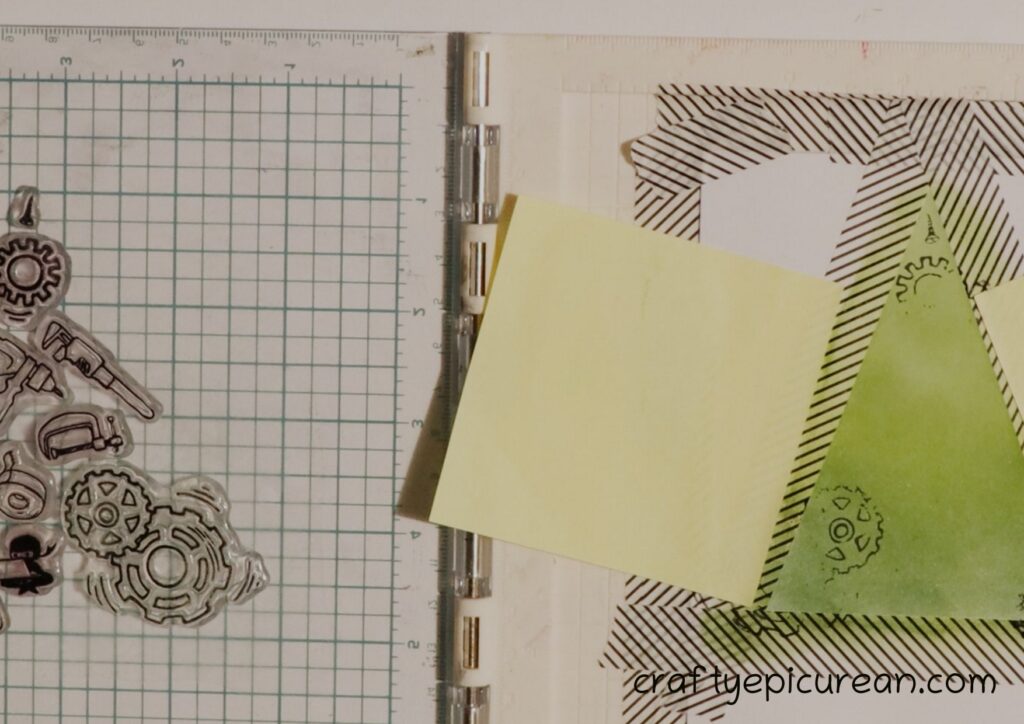
Grabbing a baby wipe, I clean the stamps and then grab the smallest image (a screw) and placed it onto an acrylic block. I then tried to fill the gaps inside the triangle using this little stamp.
Using Small Stamp and acrylic Block to fill the Gaps
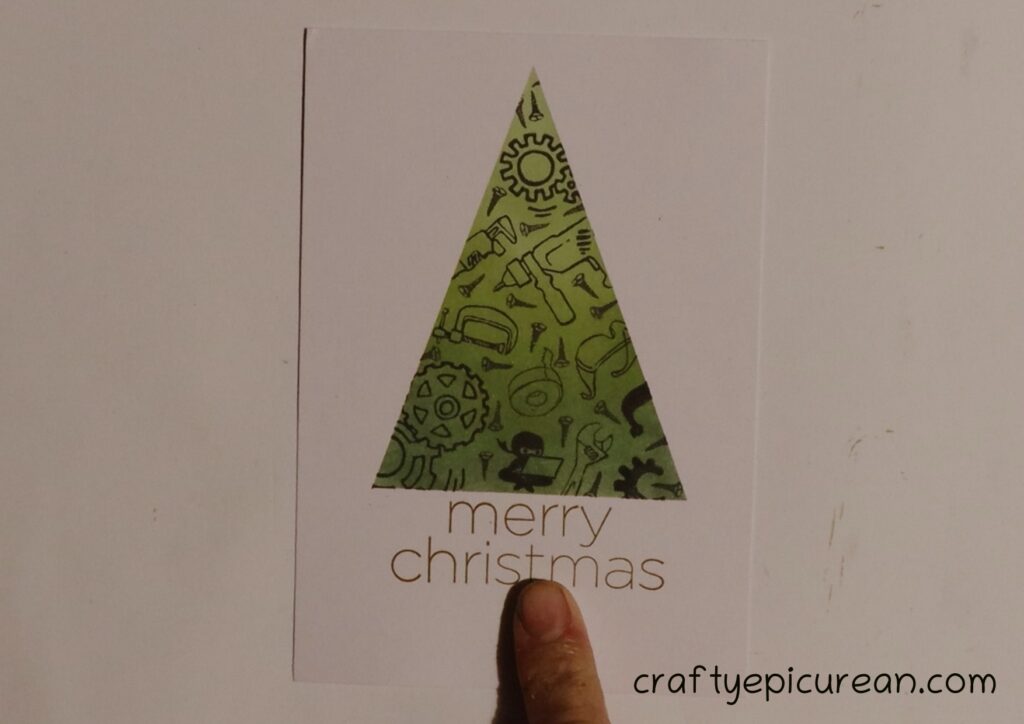
To finish off the card front I decided to stamp “merry christmas” under the triangle (this stamp is from a stamp set I bought off Aliexpress). I chose this particular stamp because the size and arrangement of the text meant I could stamp it under the triangle to symbolise the stump of a tree. I stamped this sentiment stamp using a Stazon ink pad in ‘Saddle Brown’ and an acrylic block.
Stamping 'Merry Christmas' below the tree
Used StazOn in Saddle Brown Ink for the Sentiment
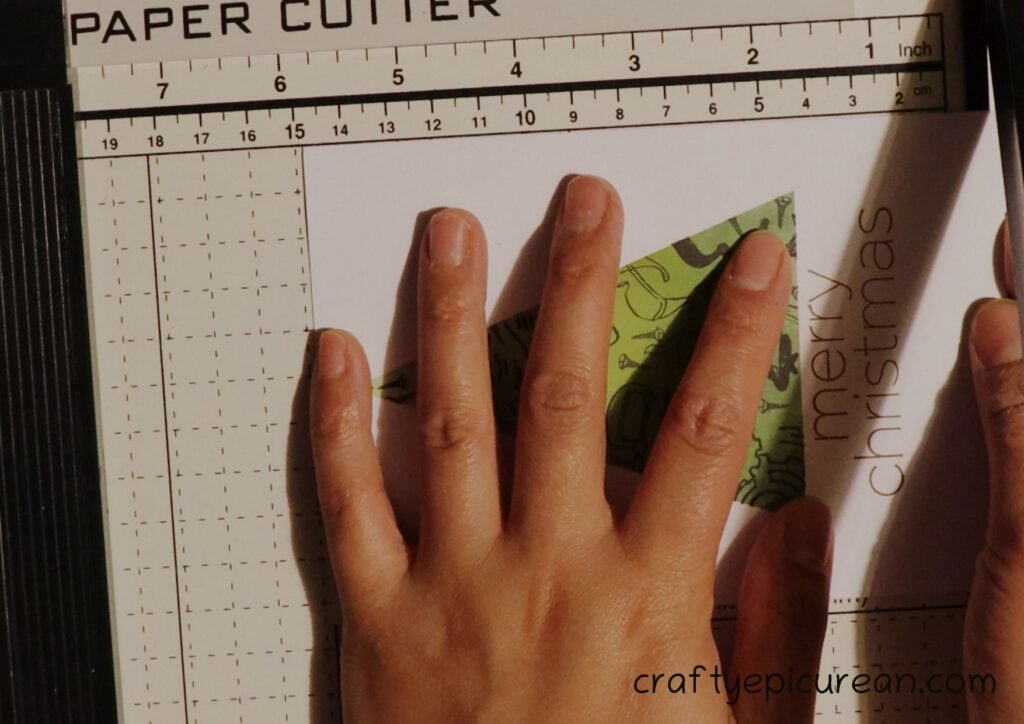
As I wanted a border or mounting for the card front, I decided to trim down the card front.
Trimming Card Front to Fit Card Base with Border
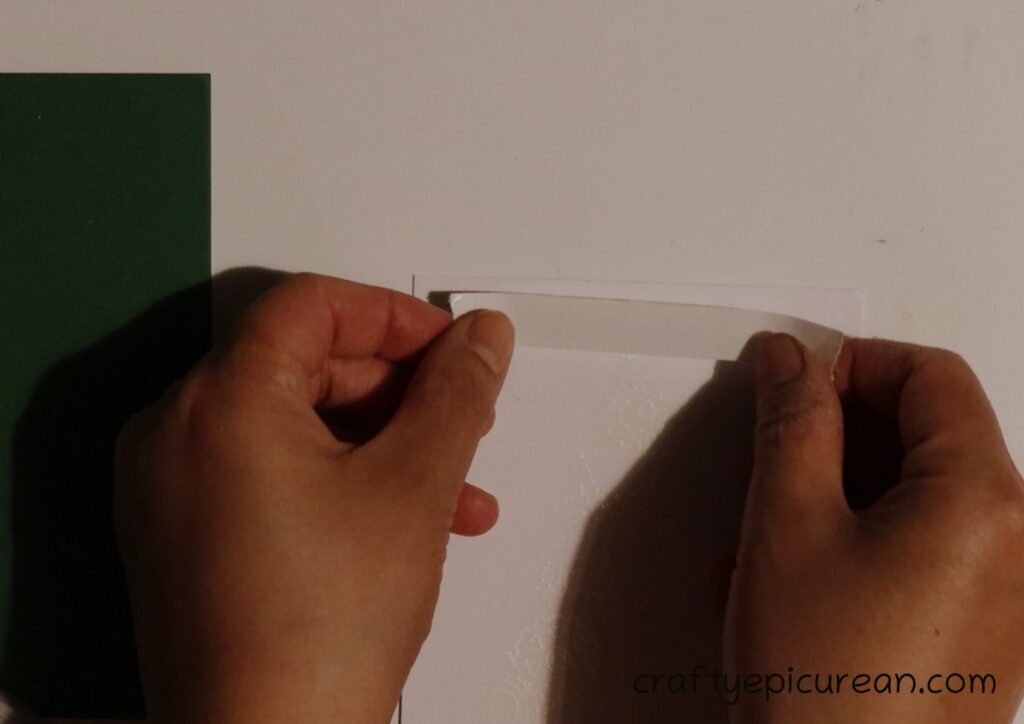
Finally, I use double sided tape to attach the card front to a dark green A6 card base. I used 180gsm card but I should have used a card base with more weight as it did feel a little floppy.
Using Double-Sided Tape to Adhere Card Front to the Card Base
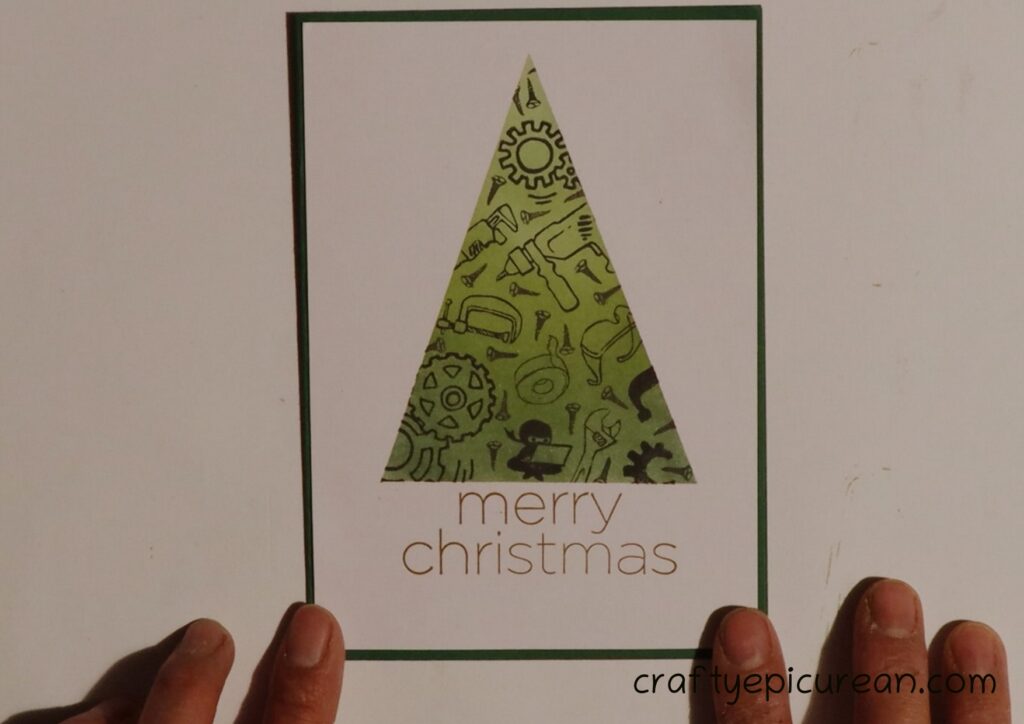
And that’s another finished card!
Finished Blended Engineer Tree Christmas Card
Here is another card I made using the same technique. Instead of engineer tools stamps I used summer themed stamps to give it a warm summer christmas feel. Click the link below to view the blog post of how I made that card.


1 thought on “Engineering Tree Christmas Card”